
Porch Refresh with Brick Pavers
Our small front porch step is desperately in need of an update. Typically I cover it up with a layered rug and coir mat, but I wanted something a little more permanent. To solve this dilemma, I decided to use some pavers I had on hand to transform our front porch step into something inviting, filled with character.

First, I played with the layout of the pavers to see if I liked them going vertical or horizontal, with or without a border or stacked.

Once the design was determined, I began the cleaning process. With the water hose on high and a scrub brush, I cleaned the porch thoroughly and then waited for it to dry completely. In the Texas heat this did not take long for such a small area.
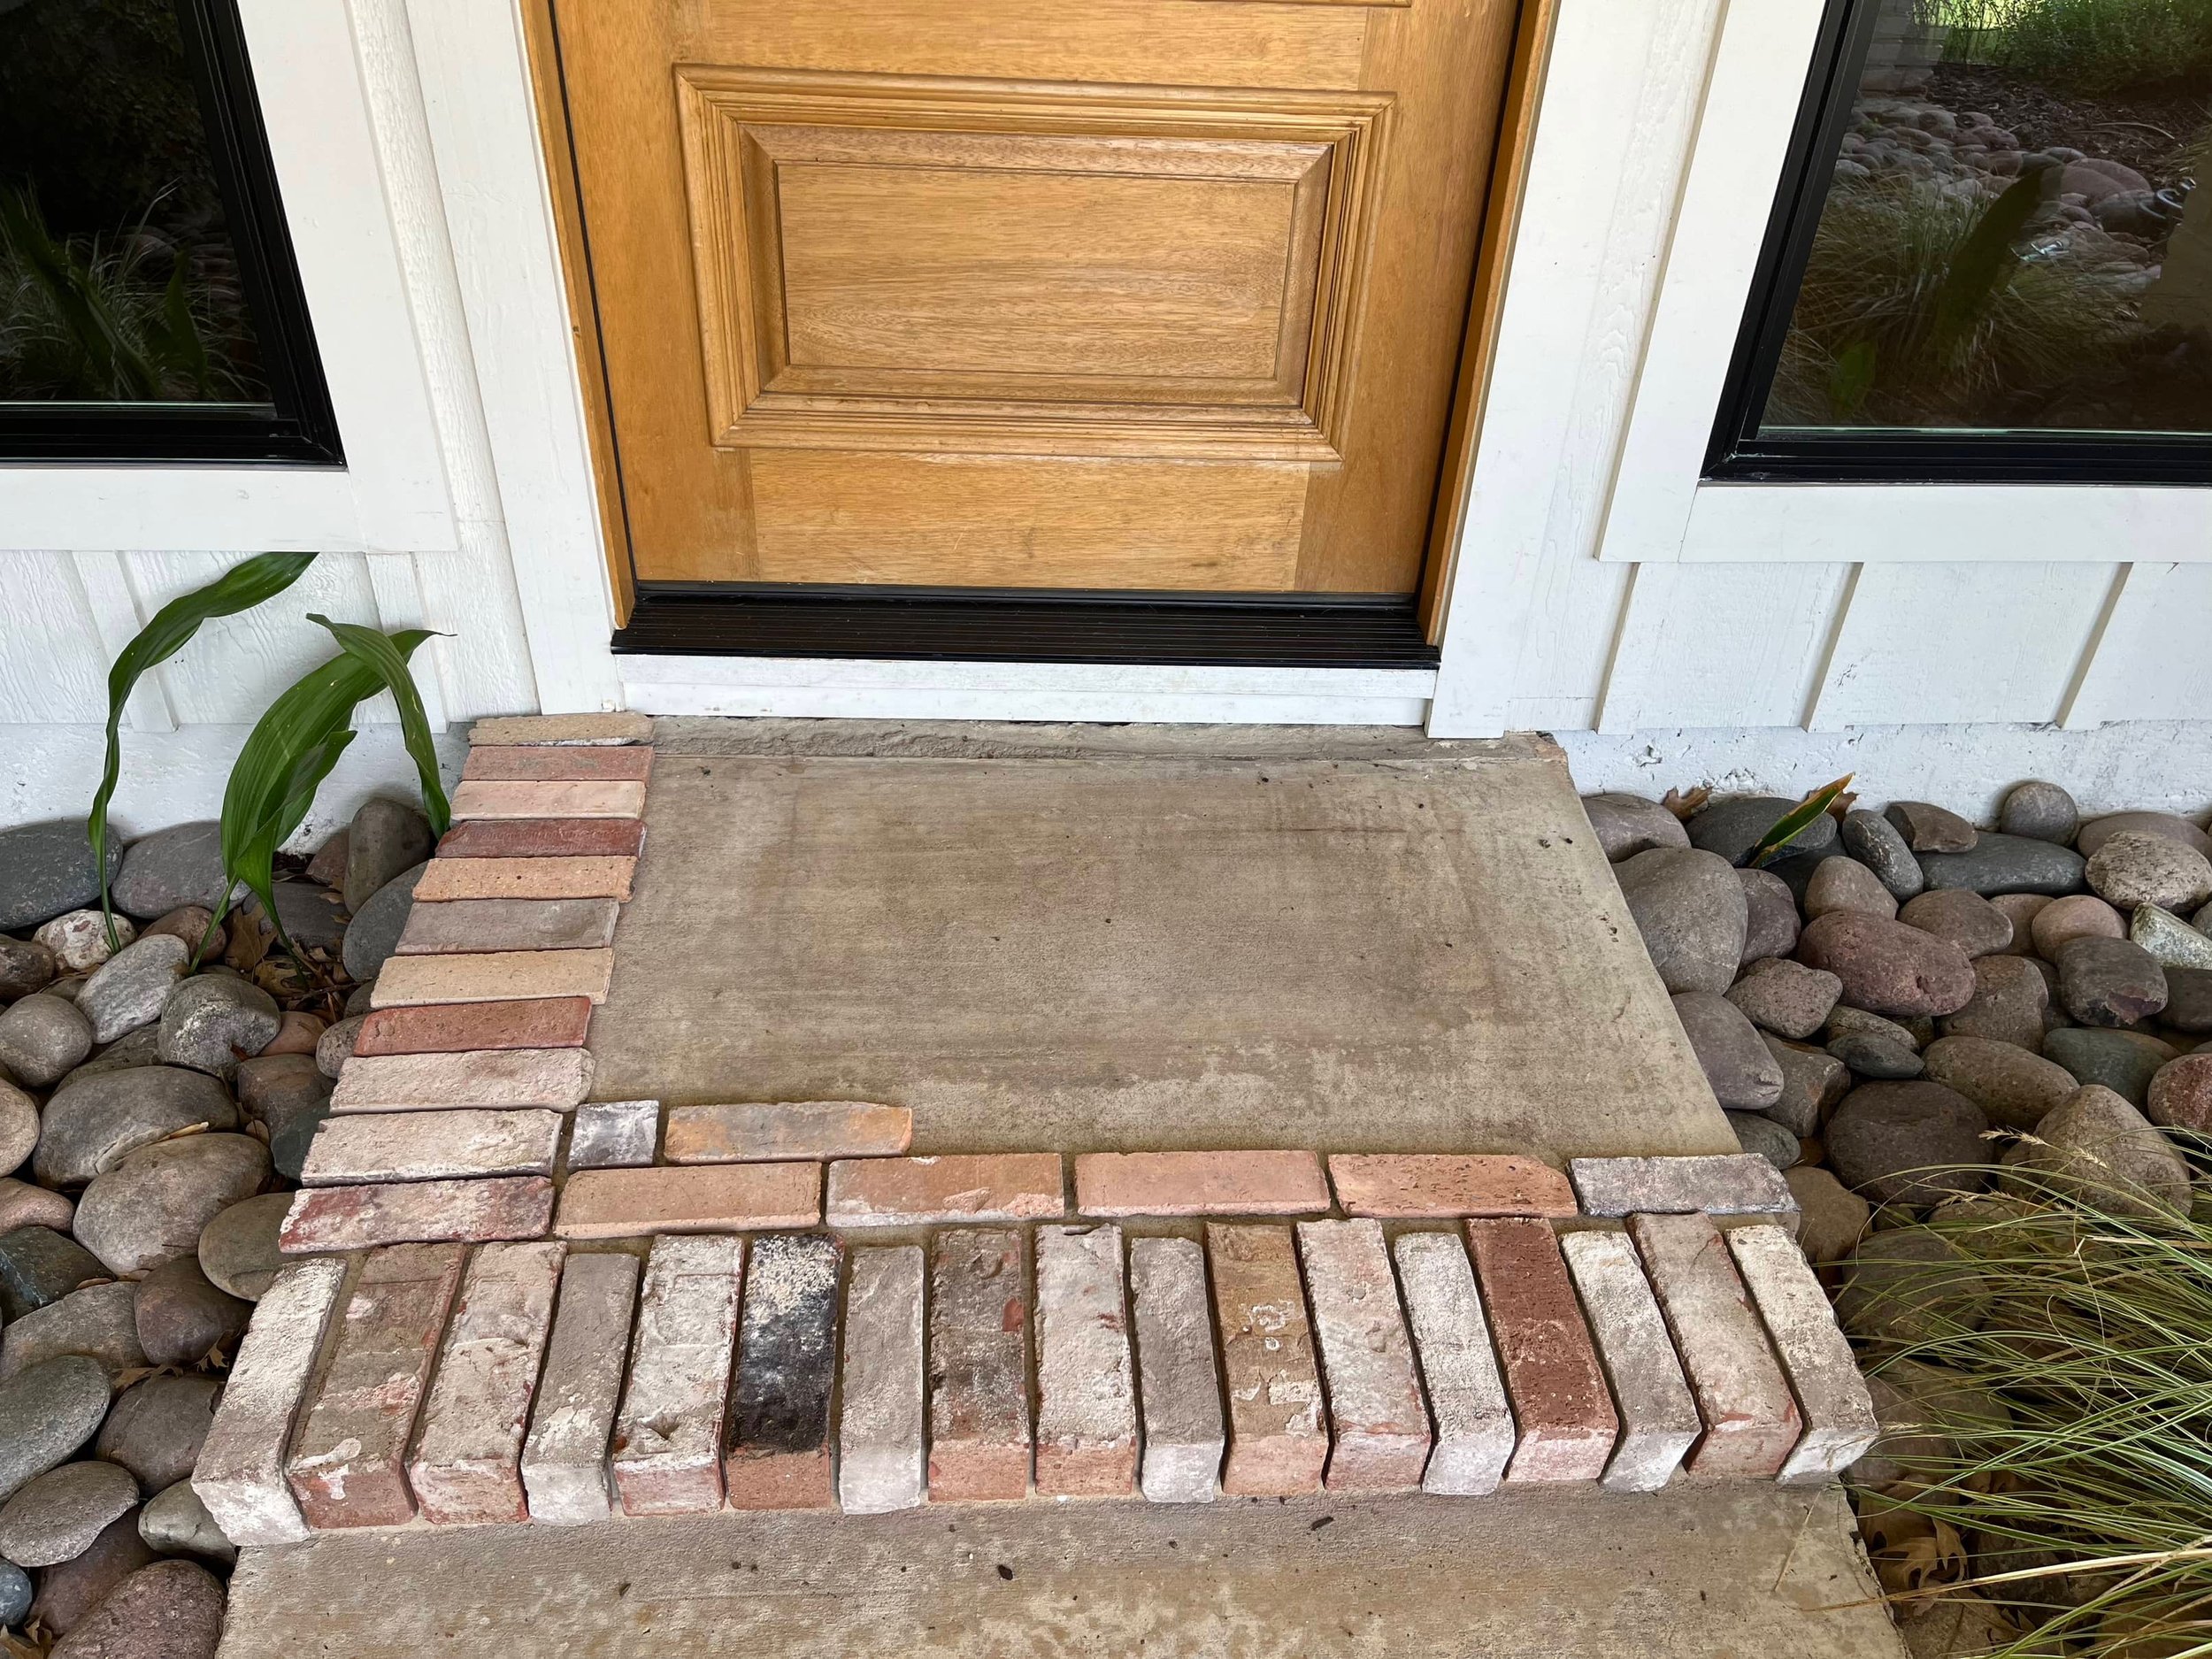
Next, I laid out the brick design. Starting with the ledge side first and working my way back to the door. I mixed and matched colors and sizes to see what looked and fit best. My husband joined me on this project and it definitely sped up the process. We used a wet saw to trim down bricks so they fit just right. (I do not think a wet saw is a must have but it definitely helped. I was working with remnants and left over brick pieces from another project so it was super handy in working with the various shapes I had.)
Then, one by one I picked up each brick starting from the edge and handed it to Keith for him to put liquid nail on the backside of the brick, then I placed it in its right position and pressed down hard. We continued this process until each brink was in place. Then we left it to dry while we mixed the grout.
We mixed the grout in a large plastic tub from Home Depot. Following the package instructions. My hubs has a drill bit for mixing which was definitely more efficient. You can mix by hand with a large trowel but make sure you get it thoroughly mixed from the bottom of the tub.
Next, I put the grout in a grout bag and piped it between each brick, making sure to fill the crevice to the top of the brick surface. I would then use my finger to wipe the grout smooth, which was easier and more precise for me than a trowel. Word of caution, it is super messy so be sure to have paper towels and/or a damp sponge on hand.
As I worked, I would wipe away any excess grout on the bricks. I like the old world vibe of a whitewash look on brick so I was not too concerned with keeping it tidy, just enough to keep the porch surface smooth.
Once complete, we left the porch to dry for 24 hours, careful to not step on it.
Here is the final result!
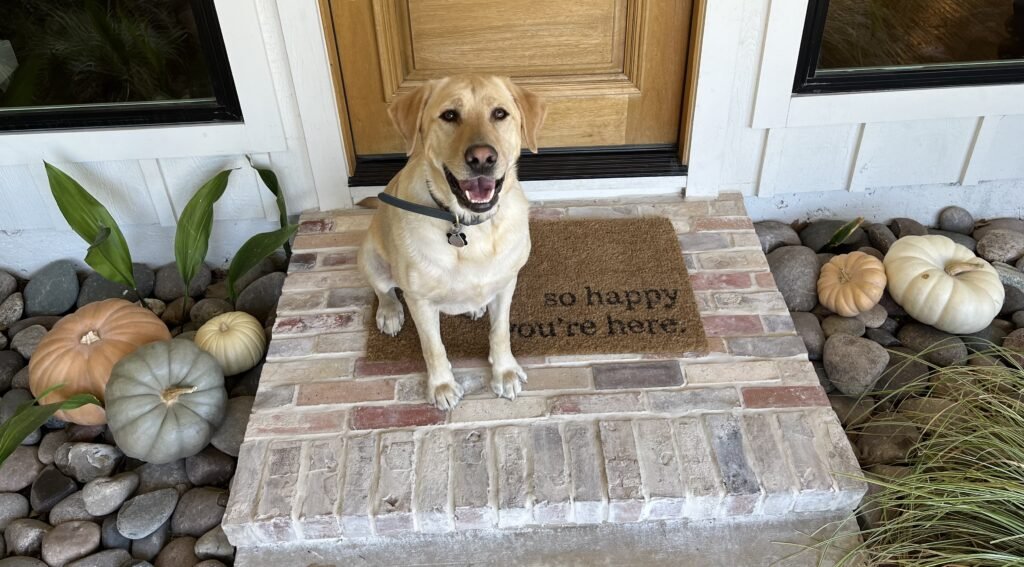
I still need to put a protective coat on it to keep from water stains, but other than that, I’m pleased with the end result. I was a little worried that the brick look might not work with our groovy mid century style house, but as it turns out, I really like it! There is no doubt that it is an improvement from the previous dingy concrete surface. It’s a win in my book!
What do you think?
BEFORE
AFTER
Feel free to reach out for my specific shopping list for you to complete this project on your own! . . . & of course, if you do, please share your before and after pics with me!