Textured Jug Makeover: Step-by-Step Guide
Textured Jug Makeover: A Step-by-Step Guide
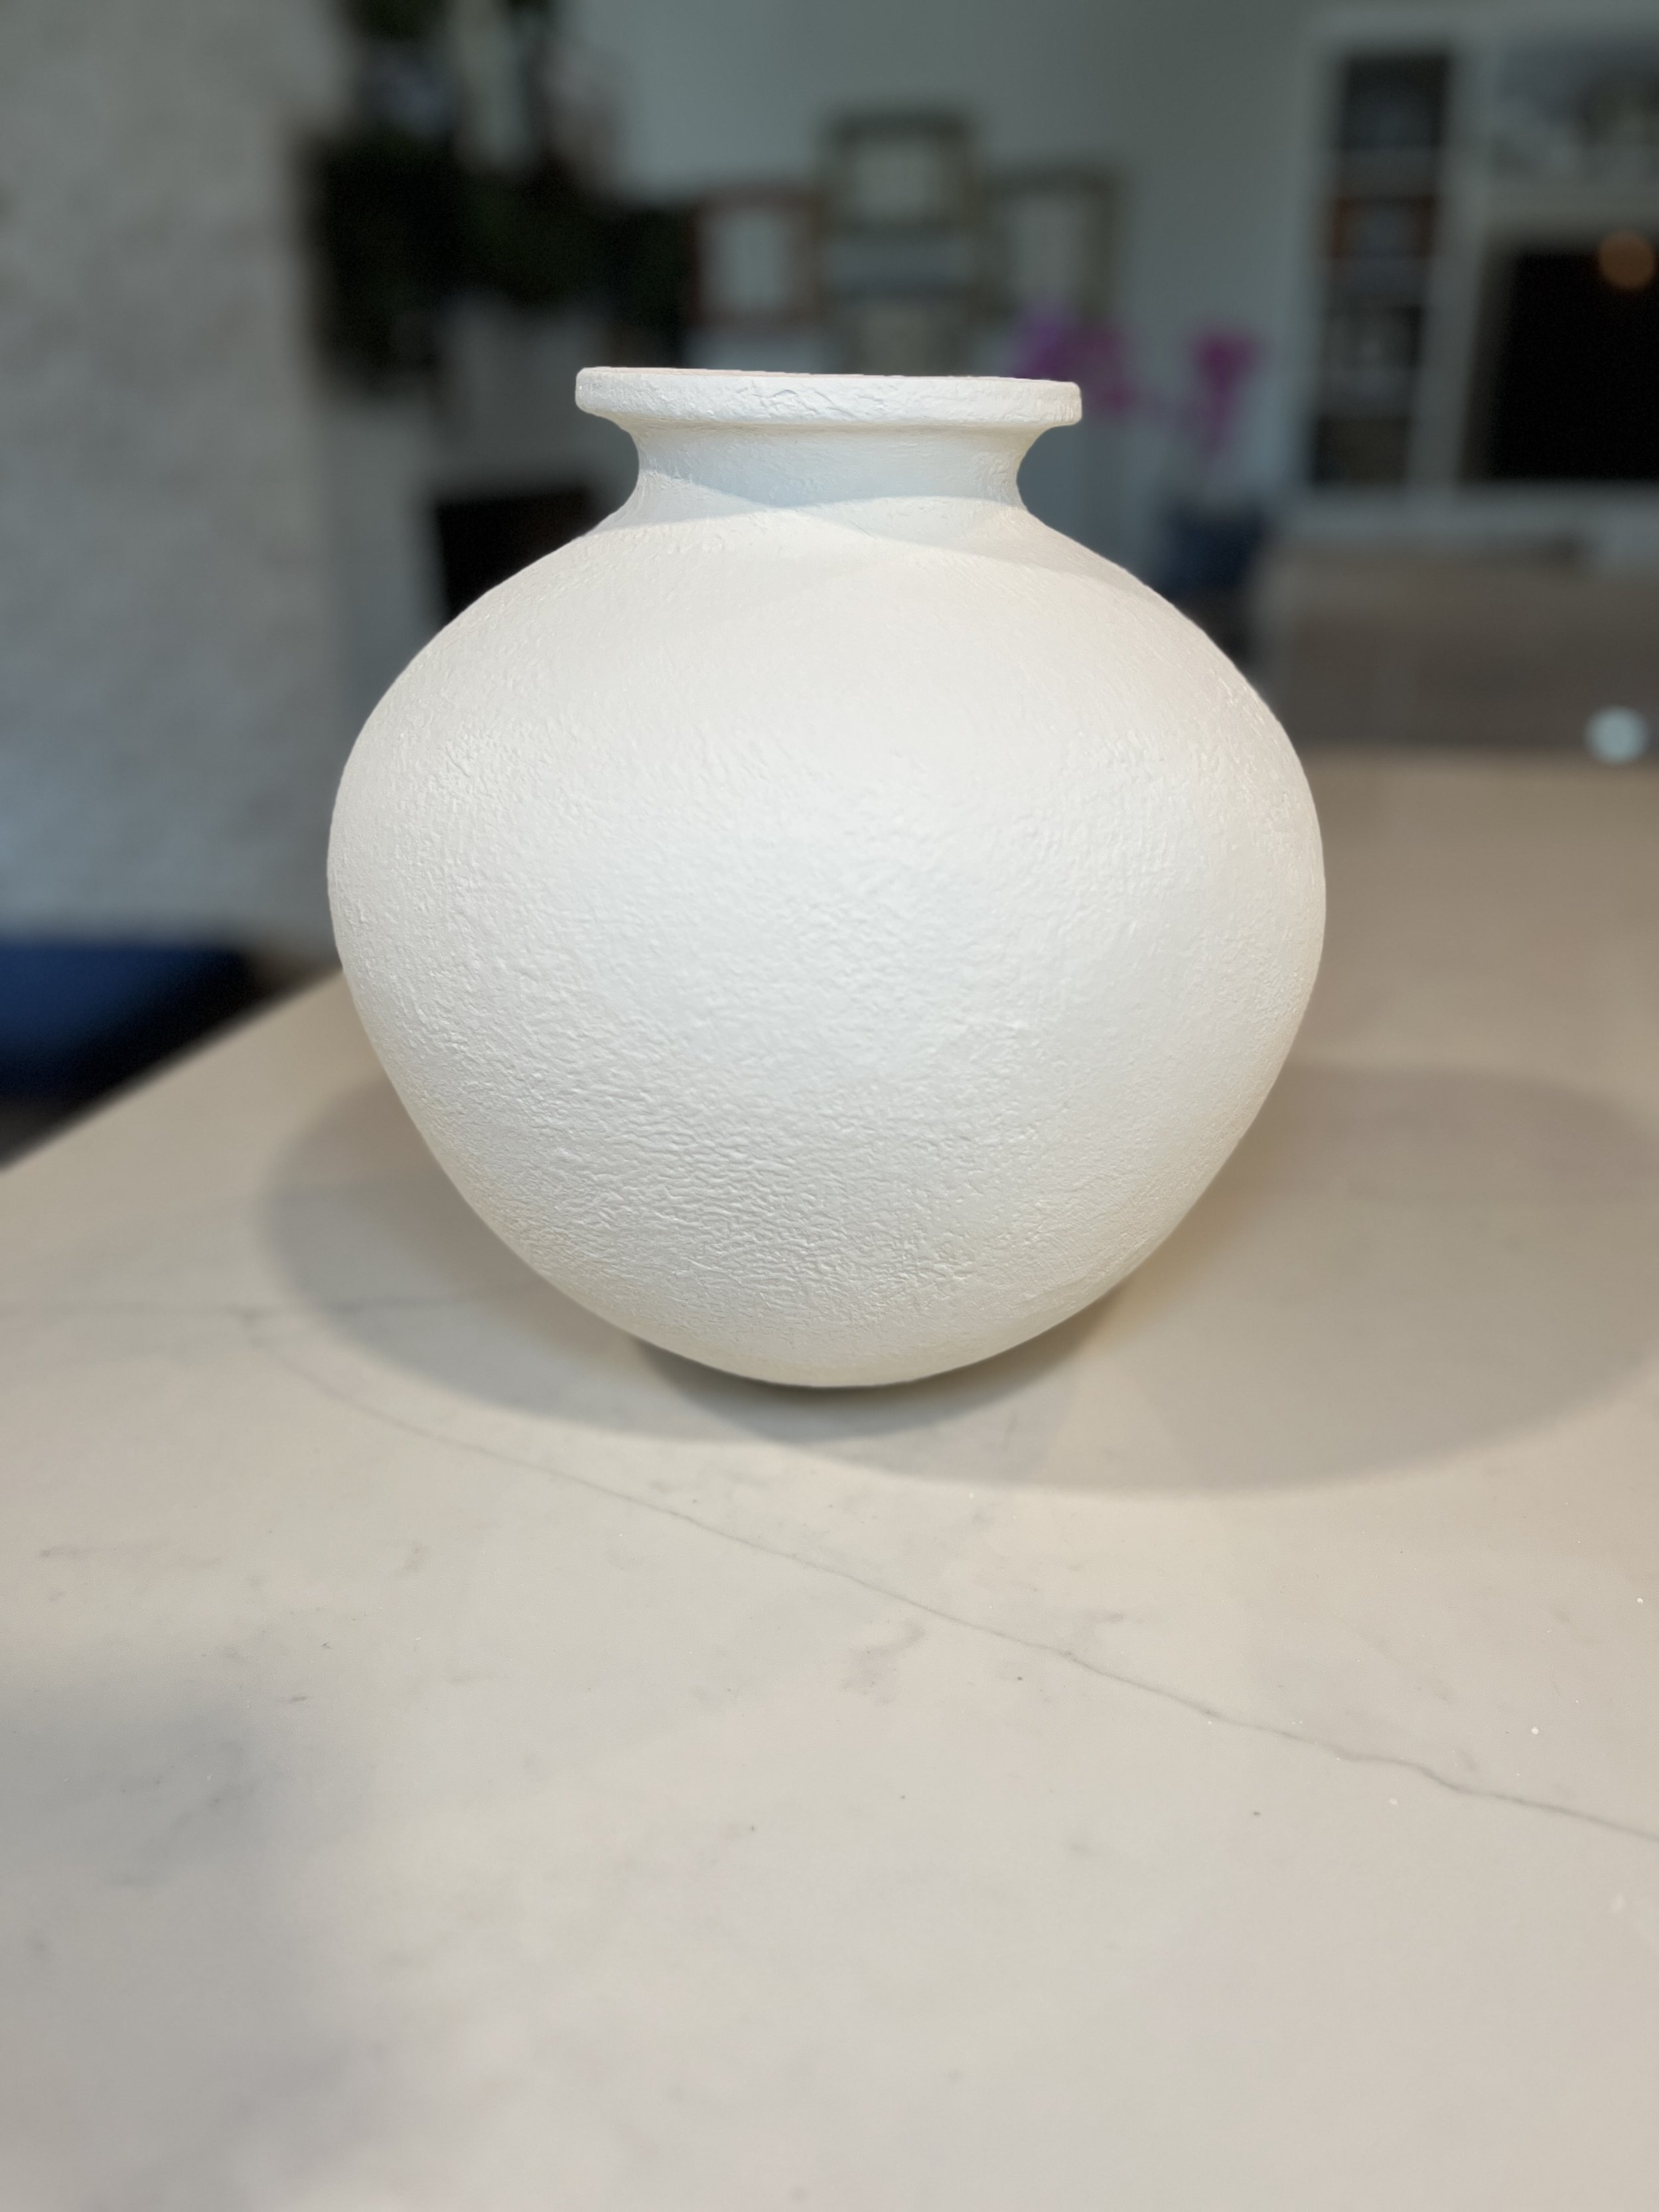
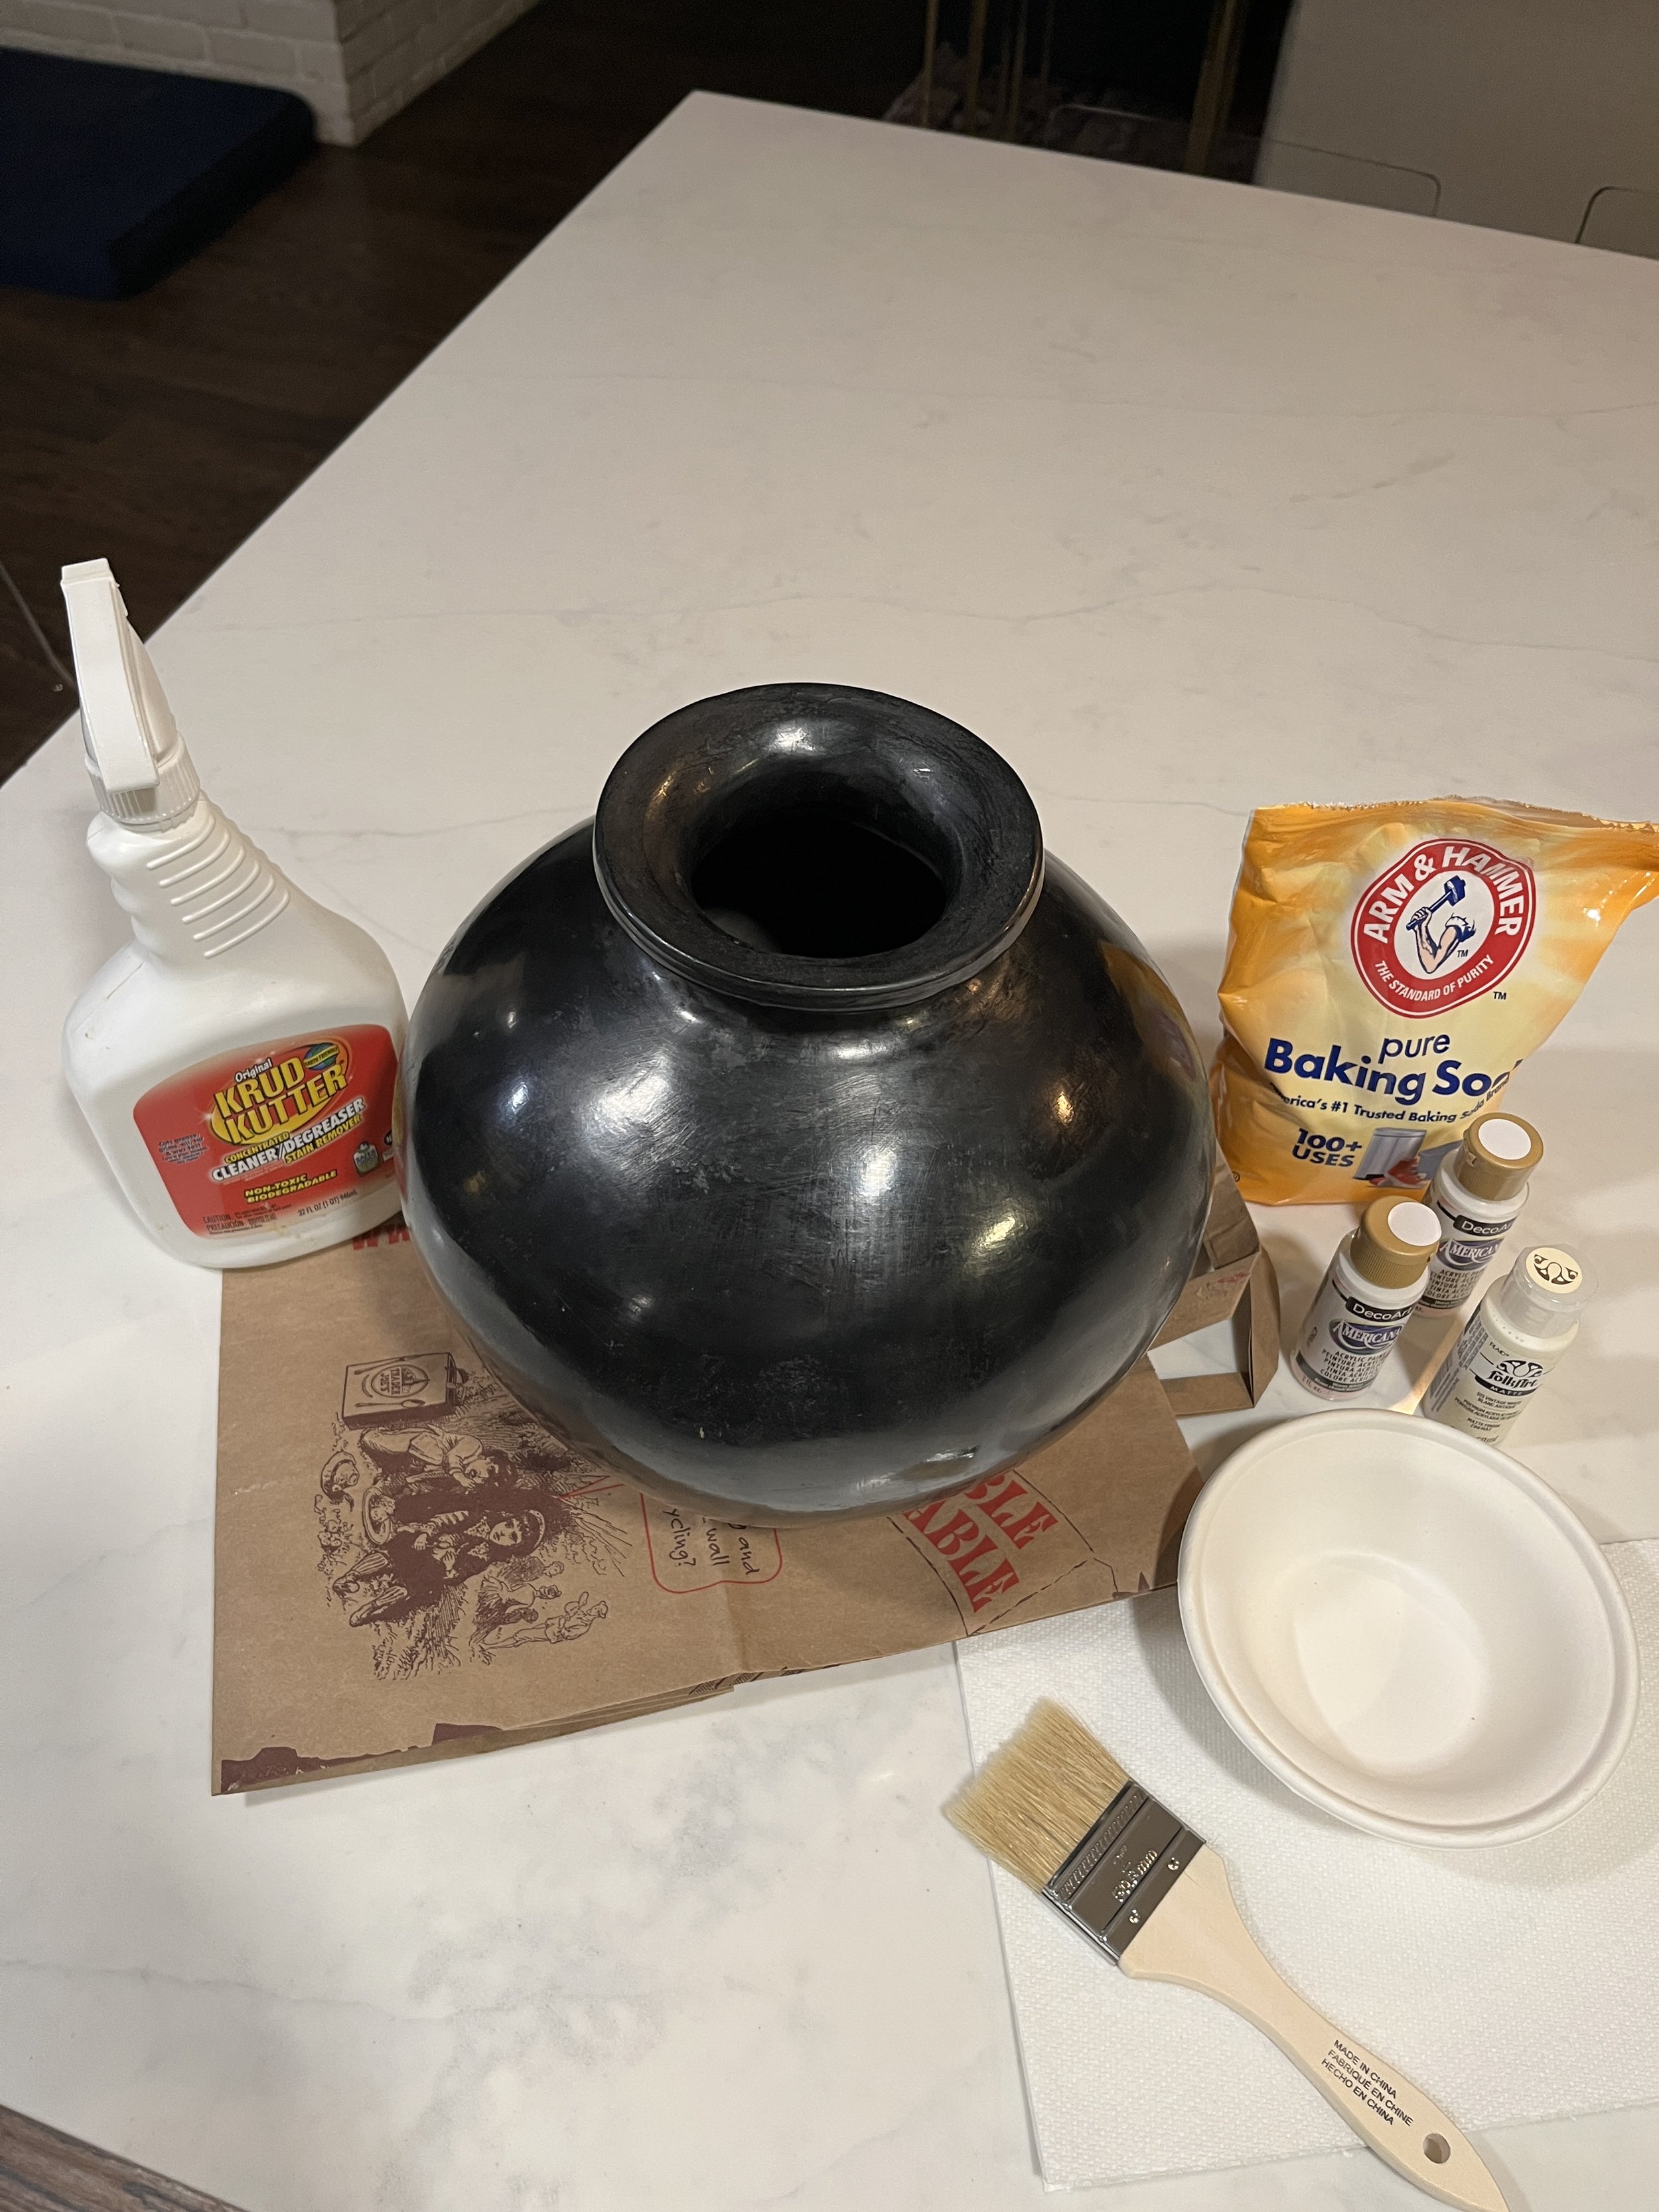
Inspired by the timeless charm of textured pottery and terra cotta pieces from West Elm and Pottery Barn, I decided to create my own version using a few supplies I already had on hand. This modern black jug, a budget-friendly Marketplace find, had the perfect size and shape but needed a little makeover to better suit my style. With minimal materials and a bit of creativity, I transformed it into a pretty neutral piece with a textured finish that adds warmth and character to any space. Here’s how you can achieve this look in just a few simple steps!
Materials Needed:
Jug (ceramic, glass, or plastic)
Krud Kutter (or any surface cleaner)
Paper towels
Paint (choose your desired colors)
Baking soda
Water
Mixing bowl
Paintbrush
Step 1: Prepare Your Jug
Before you start painting, it’s important to clean your jug thoroughly. Use Krud Kutter and a paper towel to wipe down the entire surface. This step ensures that any dirt or residue is removed, allowing the paint to adhere properly.
Step 2: Create Your Paint Mixture
In a mixing bowl, combine your chosen paint with baking soda and a splash of water. The goal is to achieve a consistency similar to putty—thick enough to provide texture but smooth enough for easy application. Adjust the amounts of baking soda and water as needed until you reach the desired consistency.
Step 3: Apply the First Coat
Using a paintbrush, begin applying the mixture to your jug in even coats. Start with the top portion of the jug, ensuring that each stroke is smooth and consistent. Allow this coat to dry completely before moving on to the next one. Once the top is dry, carefully flip the jug over and paint the bottom portion.
Step 4: Experiment with Colors
One of the joys of DIY projects is the ability to customize your creation. For this project, I combined two colors of paint, mixing them until I was satisfied with the shade. While I opted for lighter tones for a textured look, feel free to experiment with contrasting colors for a more vibrant effect. The choice is yours!
Step 5: Final Coat Application
For the final coat, I used only the diluted paints without adding any baking soda. This decision allowed me to achieve a smooth finish while still maintaining the texture from previous layers. Apply this final coat evenly across the jug and let it dry completely.
Step 6: Style Your New Creation
Once your jug is fully dry, it’s ready to style. Put it in a collection with other vases or add some tall branches for height. There are lots of possibilities! I cannot wait to style mine for Spring!
What do you think? . . .